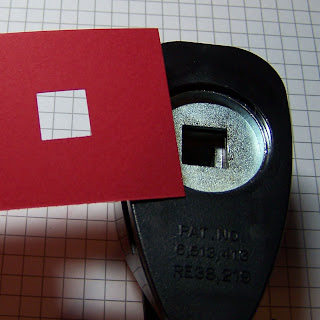
 1) Using a scrap piece of paper, punch a square with a small punch (I used 1/2").
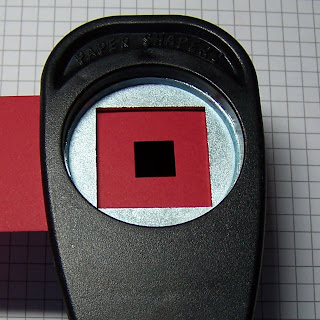 2) Using a larger square punch, center around your original smaller punched out square and punch. (I used SU's 1 3/8").
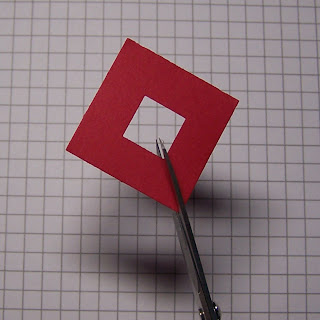 3) Take your handy dandy scissors and cut at the corners into two pieces. I just eyeballed it, if you like to be more precise I imagine you could use a ruler & hobby blade, or try to line it up in your trimmer or something.
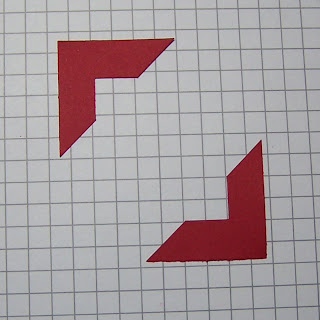 4) TA-DAAAA!! Easy peasey photo corners!!
I've tried other techniques for making these myself, and they usually come out cockeyed or uneven. This totally worked for me! And if you happen to have a large collection of square punches (*ahem*), the sizes of your photo corners are nearly limitless. :-) So a great big thanks to Jackie at the Archivers in north Austin, she made my night! I'll make a card tomorrow night using photo corners - tonight I actually need to hit the hay early - all of this late-night stamping is starting to catch up with me, I need my beauty sleep. :-) Hope you enjoyed my first-ever blog tutorial, and if you create something cool with these nifty photo corners please link it in the comments so I can take a peek! Happy stampin' ya'll! :-)
Edited to Add: ACK!! Don't know what's up with this awful formatting, it doesn't look like this in my preview & I can't seem to make those big white spaces go away. Sorry about that!







Thanks for your first ever tutorial! It was great, by the way. You should do more (wink).
ReplyDeleteI never use photo corners for the reason you said...mine are never symmetrical, and looked terrible. I am going to have to try this for sure!
Great idea! Thanks!!
ReplyDeleteAbout the big white spaces: put your cursor on the left side of the page while editing your post, and hit "delete", you will see the photo's go "up". Be careful and check out inbetween, one hit too many and your photo is gone :(
OK, I would NEVER have thought of thought! How clever!
ReplyDelete(adding square punches to my wishlist...)
OMG! Totally awesome! I can't believe I never thought of that! You go girl!
ReplyDeleteLibby, I hope you do more tutorials in the future...this was great! TFS
ReplyDeleteUm - Hello! How easy is that???! Thanks Libby!
ReplyDeleteThat is so awesome! I have a photo corner punch, but this opens up possibilities for new sizes!
ReplyDeleteCool idea! I'll be in Austin next week, so I'll have to go visit Archivers and see if I can learn any new things too!
ReplyDeleteOh, my goodness, Libby! Thank you, thank you, thank you!! This is way too easy. I've done the other kind and I do like them, but this is incredibly quick and easy. I have 3/4", 1 1/4" and 1 3/8" punches--that'll work, I'm sure! How exciting!
ReplyDeleteWhat a great idea!! Thanks so much, as a phote corner punch was on my list of things to buy, now I can use that $$ for something else!
ReplyDeleteI love those photo corners.
ReplyDeleteThanks for the tutorial! I'll definitely be making more of them! :)
ReplyDeleteOoo! I'm definitely going to use this one.
ReplyDeleteSHUT UP!!!!!!! .........THUD!!! (passed out cold on the floor in stupefied admiration) You are genius. Pure genius!!! TFS!
ReplyDeleteThis is just plain AWESOME! Hope you don't mind that I linked you in a blog post on photo corners and put your blog on my roll. Thanks for taking the time to do the tutorial.
ReplyDeleteMel
P.s. I just did my first one too. :0)
I know this is an old post, but it's great. Where did you get a half inch square punch?????
ReplyDeleteThanks for the lesson, saved me fifteen dollars, Yeah!
ReplyDelete